telink_rf4ce_sdk Getting Started
Overview
About this document
This document is intended to help you quickly set up the telink_rf4ce_sdk development environment, obtain the Software Development Kit (SDK), compile and flash the project, and successfully run your first example project. To read this document, you should have basic knowledge of the C language and embedded development.
Scope
telink_rf4ce_sdk supports Telink SoCs such as the TLSR825x, TLSR827x, TLSR952x, and TL321x series.
Note
The chip information listed here may not be the latest. For complete and accurate information on chip series, corresponding development boards, development platforms, toolchain versions, and SDK versions, please refer to the latest Release Notes.
Development preparation
Hardware preparation
| Hardware | Description |
|---|---|
| PC | Windows 10/11 / Linux / macOS (This document uses Windows as an example) |
| Development board | Select a suitable development board according to the Release Notes |
| Programmer | Programmer V3 is recommended |
| USB cable | Connects the PC to the programmer |
| Dupont wires | Connect the development board to the programmer |
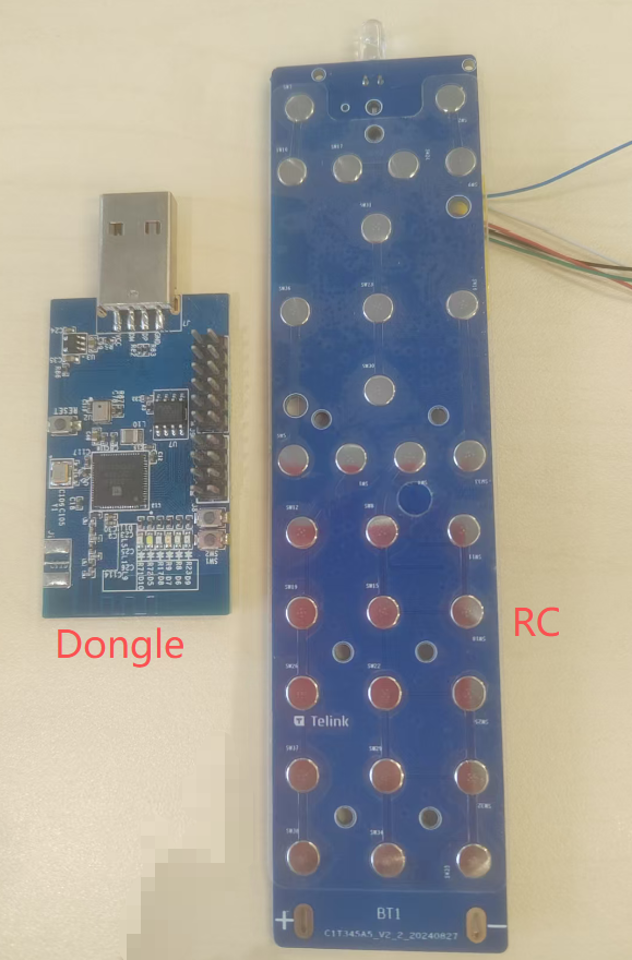
This document uses the TL321x Dongle and the TL321x RC (Remote Control) custom development board as examples. The TL321x Dongle and the TL321x RC custom development board are designed for specific application scenarios. If you are interested, you are welcome to contact us for more information.
Photos of the development boards are shown below:
Software preparation
| Software | Description |
|---|---|
| IDE | Telink VS Code Extension |
| Flashing and debugging tool | Burning and Debugging Tool (BDT) |
| Host tool | RF4CE_KeySim3.0 |
| SDK | GitHub / Gitee |
Note
The RF4CE_KeySim host tool is released together with the SDK and is located in the telink_rf4ce_sdk\Tools directory.
Install the development environment
Install VS Code
Before installing the extension, make sure the latest version of Visual Studio Code is installed on your computer. Telink VS Code Extension is kept in sync with the latest version of VS Code. If the VS Code version is too old, the extension may fail to work properly or behave abnormally.
Install Telink VS Code Extension
- Launch VS Code.
- Click the Extensions icon in the left activity bar, or use the shortcut Ctrl+Shift+X.
- Type "Telink" in the search box.
-
Find Telink Development Tool in the search results and click Install.
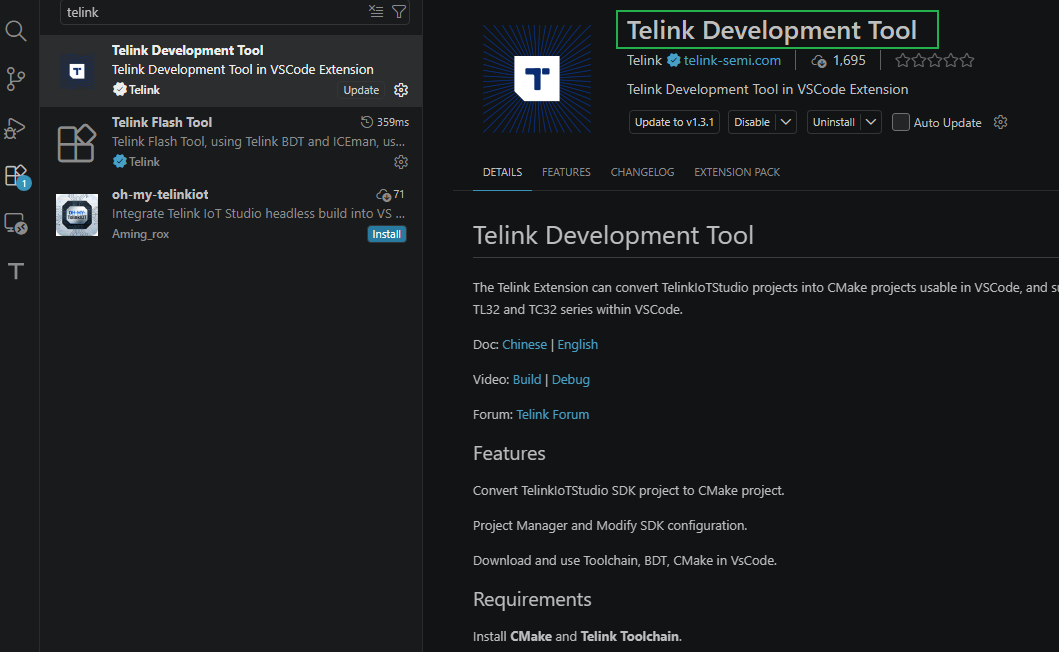
After installation, the Telink DEVELOPMENT icon will be displayed in the left activity bar of VS Code.
Install the toolchain
In Telink VS Code Extension, download the compiler toolchain and auxiliary tools on demand through the built-in manager of the extension.
-
In the Telink DEVELOPMENT view on the left side of VS Code, expand the DEVELOPMENT TOOLS tree menu.
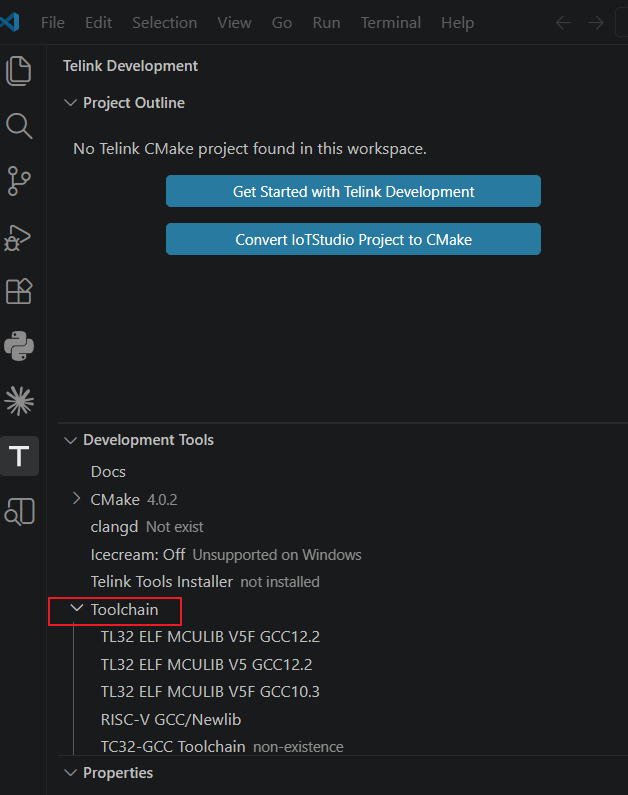
-
Click the desired toolchain, and then click Install Toolchain on the right.
-
After the installation succeeds, a corresponding completion notification will pop up in the lower-right corner of the VS Code window.

Note
To use the toolchain in a command line environment, right-click it and click Open Terminal in the pop-up menu.
Install auxiliary tools
Select CMake in the tool list, right-click it, and click Install in the pop-up menu.
Environment verification
After the installation, verify whether Telink VS Code Extension is installed successfully by following the steps below:
- Launch VS Code and confirm that the software opens normally without any error messages during startup.
- Confirm that the Telink icon appears in the left activity bar, and click the icon to enter the Telink DEVELOPMENT view.
- In the DEVELOPMENT TOOLS tree menu, confirm that the installed toolchain shows the Installed status on the right.
- Also confirm that the auxiliary tool CMake shows as installed on the right.
If all the above checks pass, then Telink VS Code Extension and its dependent tools have been successfully installed and configured, and you can download the SDK and start development.
Obtain and import the SDK
This chapter describes how to obtain the official Telink SDK, understand the top-level directory structure of the SDK, and import the SDK project into the IDE.
Download the SDK
Download the latest SDK from GitHub or Gitee, or clone the repository to your local machine by running the following git clone command:
git clone https://github.com/telink-semi/telink_rf4ce_sdk.git
or
git clone https://gitee.com/telink-semi/telink_rf4ce_sdk.git
SDK directory overview
The main top-level directories of telink_rf4ce_sdk are as follows:
| Directory | Description |
|---|---|
build/ |
Project build directory |
net/ |
Protocol stack |
platform/ |
Chip platform drivers |
proj/ |
Common functions, driver adaptation layer |
tools/ |
Script tools |
vendor/ |
Example projects |
Import the project in VS Code
- Click File -> Open Folder... in the VS Code menu bar, and select the root directory of the project to load it.
-
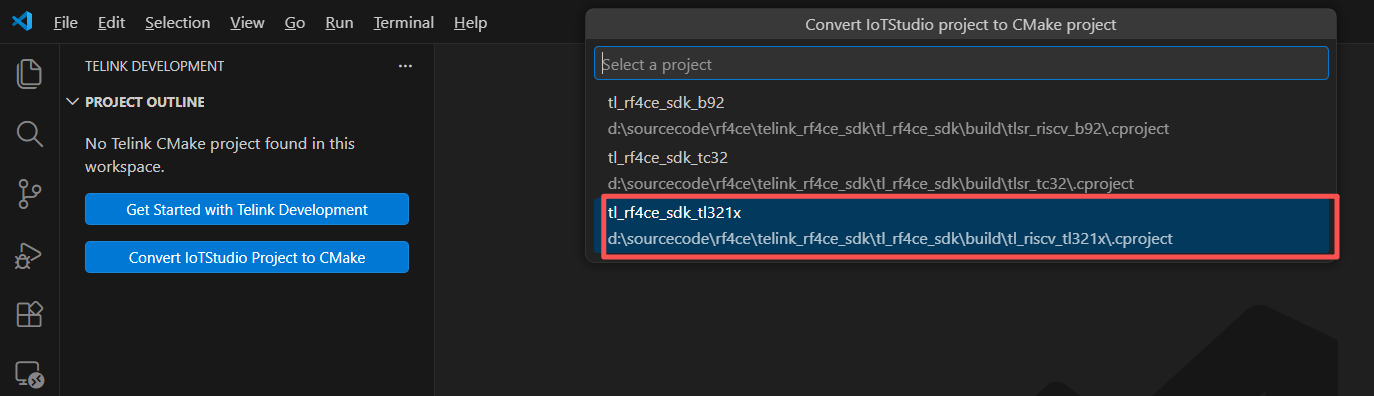
Click the Telink icon in the left activity bar to enter the Telink Extension view, and click the Convert Telink Project button next to PROJECT OUTLINE.
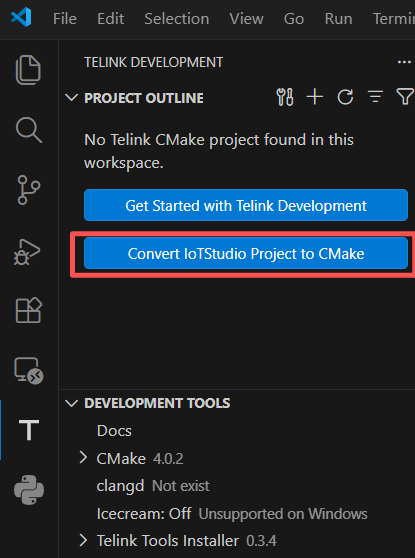
-
Select the chip series you need in the search bar to convert it to a Telink VS Code Extension project.
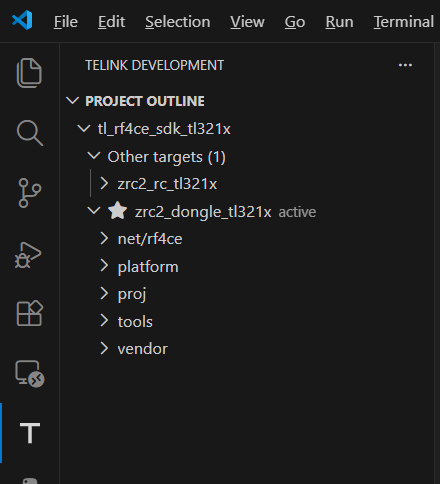
After the project is imported successfully, you will see:
Compile and run the first example
This chapter will guide you through the complete development workflow, from selecting an example and compiling the code to finally flashing and running it.
Select an example
It is recommended to use the official zrc2_dongle_tl321x and zrc2_rc_tl321x as your first set of example projects:
The testing methods for these two projects are as follows:
zrc2_dongle_tl321x(Dongle side): Flash the firmwarezrc2_dongle_tl321x.bingenerated by compiling this project to the Dongle development board. After the board is connected to the PC via USB, it will be recognized as a COM port. Through this serial port, you can quickly verify the firmware flashing and basic operating status. In this test, it simulates a TV or set-top box device.zrc2_rc_tl321x(RC side): Flash the firmwarezrc2_rc_tl321x.bingenerated by compiling this project to the RC development board to serve as the remote control device.
For more examples, refer to ...\telink_rf4ce_sdk\tl_rf4ce_sdk\vendor.
Compile the project
- In the left sidebar of VS Code, find PROJECT OUTLINE, and select the project to compile and its corresponding Target.
-
Click the compile button on the right to compile.
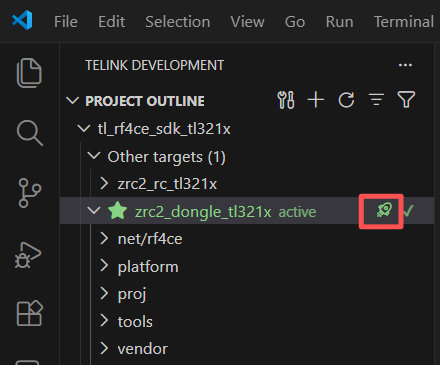
After compilation, the output files (
.elf,.bin,.ls) are generated in the ...\telink_rf4ce_sdk\tl_rf4ce_sdk\cmake_builds\tl_rf4ce_sdk_tl321x\TL32_ELF_MCULIB_V5_GCC12_2 folder. Theelfformat file is used for debugging, and thebinformat file is used for flashing. If the compilation succeeds, you will see output similar to the following: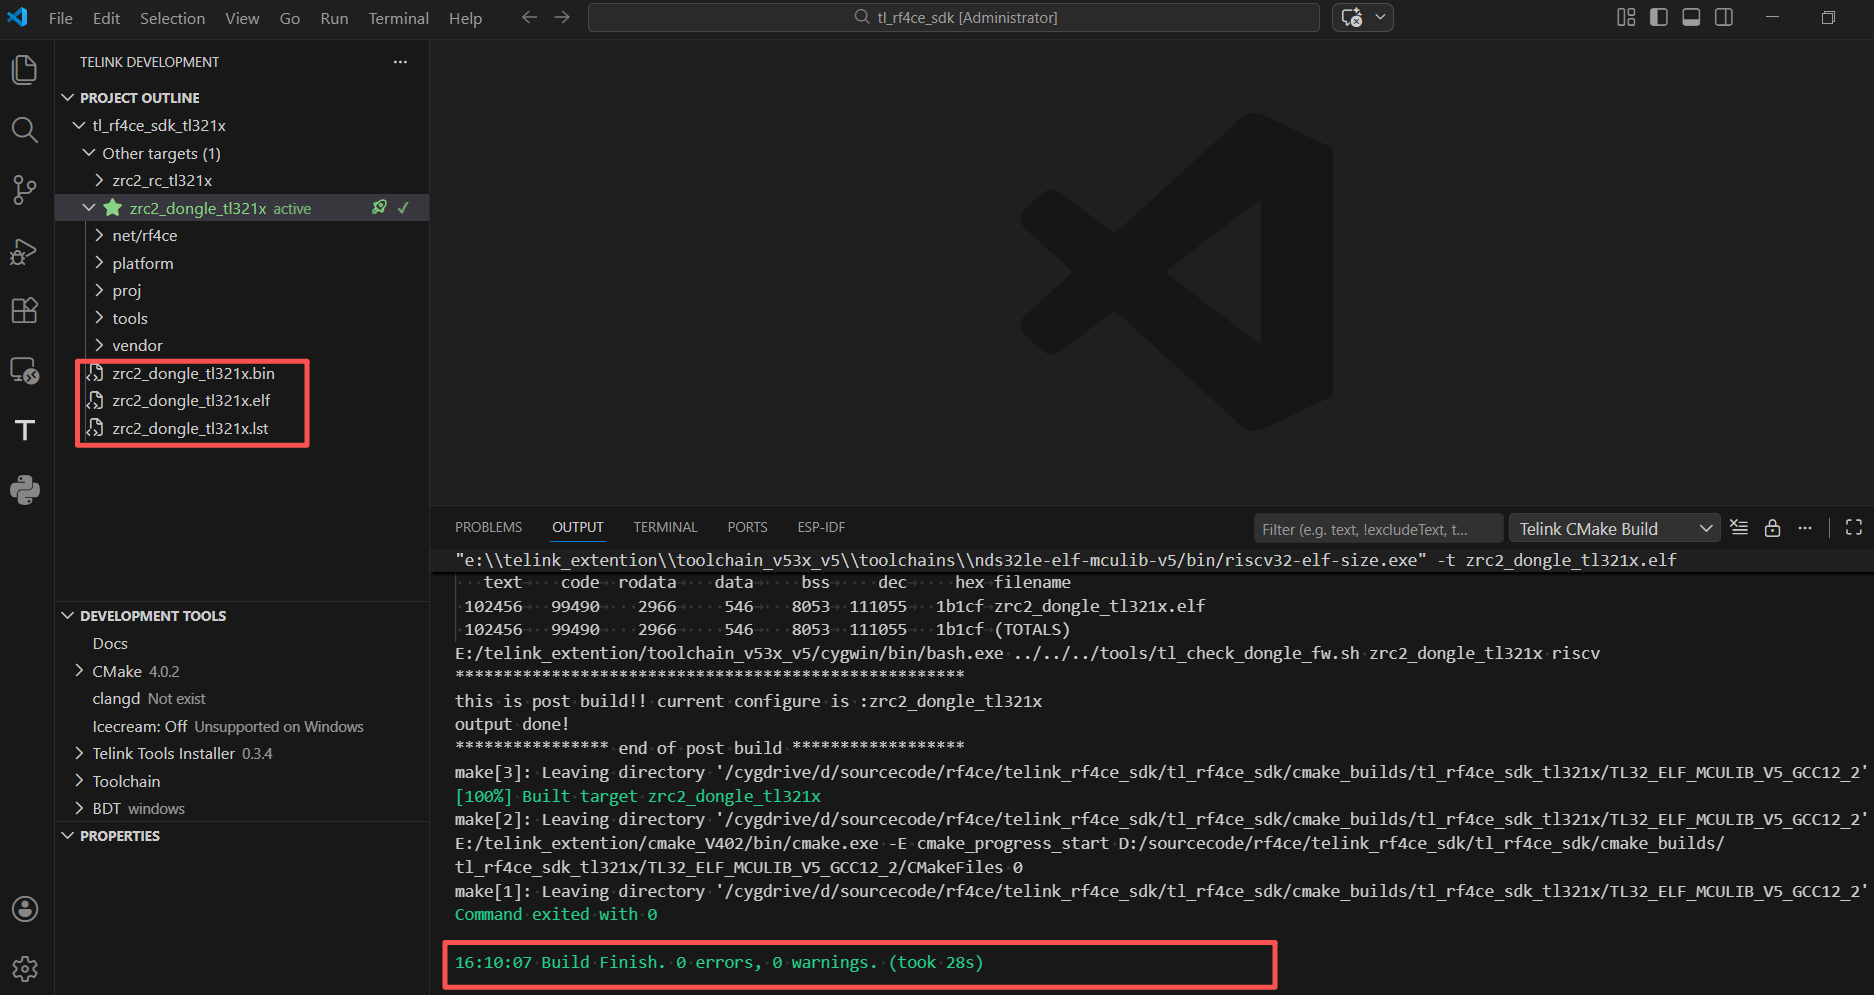
During testing, flash the firmware zrc2_dongle_tl321x.bin and zrc2_rc_tl321x.bin generated by compiling the above projects to the corresponding Dongle development board and RC development board to verify the complete remote control functionality.
Flash the firmware
Use the BDT tool to flash the firmware. Connect the hardware for the RC and Dongle development boards in the same way, then flash them one at a time.
Step 1: Connect the hardware
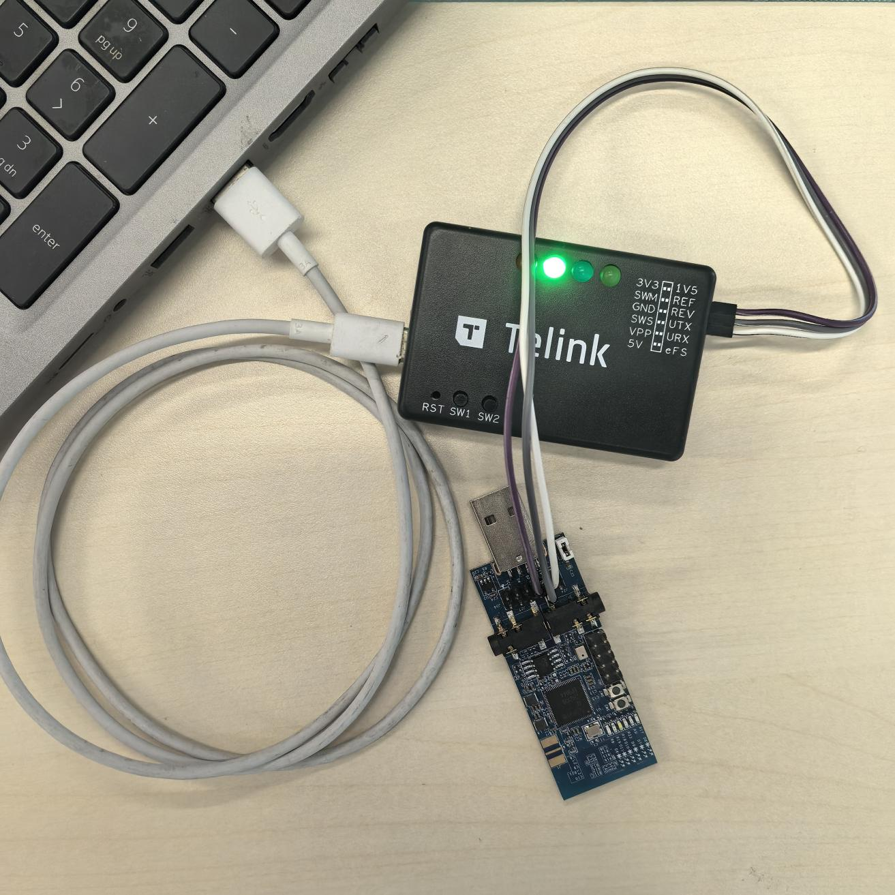
Before using the BDT tool, connect the PC, the programmer, and the development board as follows:
- PC ↔ Programmer: Connect them with a USB cable. If the green indicator light on the programmer stays on, it means the programmer has been successfully recognized by the PC.
-
Programmer ↔ Development board: Connect them with Dupont wires:
- Power lines: VCC ↔ VCC; GND ↔ GND
- Data line (single-wire SWM bus): Connect the SWM pin of the programmer to the SWS (Swire) pin of the development board.
Note
The flashing wires for the RC development board need to be routed from the back of the board.
Step 2: Install BDT
Telink Burning and Debugging Tool (BDT for short) is used to flash the compiled firmware to the target chip or development board.
-
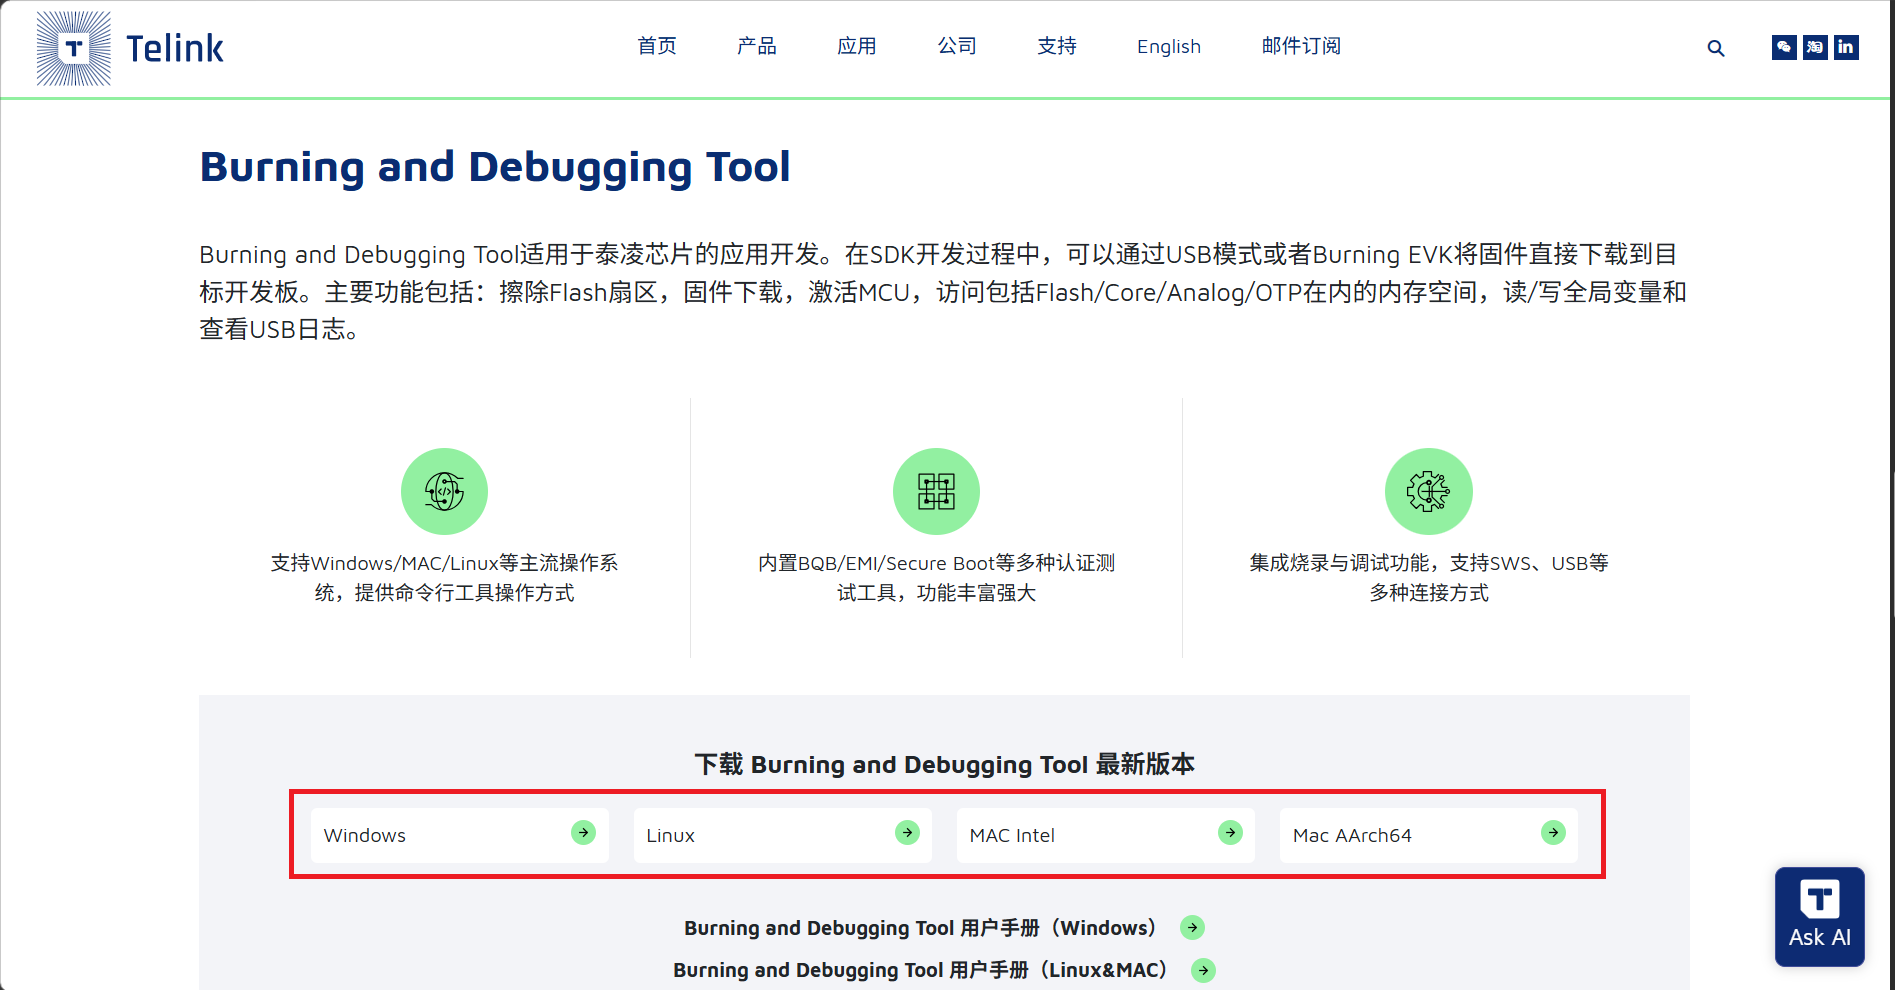
Download the BDT tool.
Visit Telink Developer Center - Development Tools, and download the corresponding tool package according to your operating system.
-
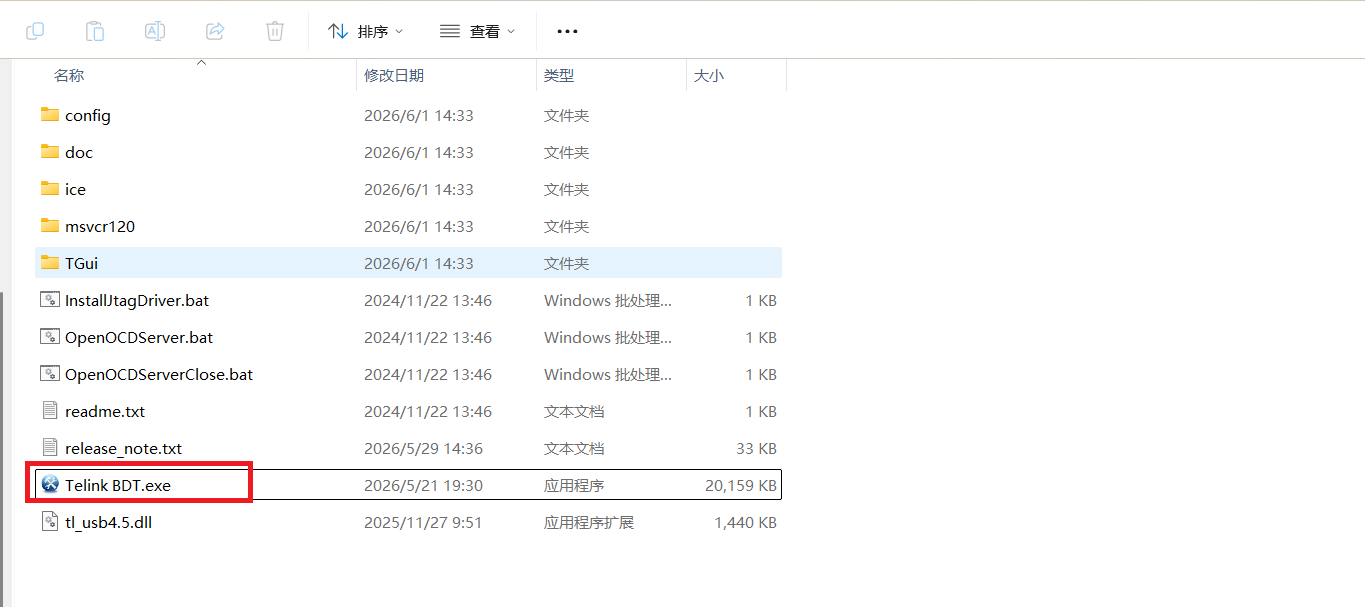
Extract the tool package (BDT is a portable version that requires no installation; just extract it and use it).
Taking Windows as an example:
- Extract the downloaded tool package to a custom path, for example C:\Telink\BDT.
- Enter the extracted release directory, for example C:\Telink\BDT\release_v5.9.4.
- Double-click Telink BDT.exe to launch the tool.
-
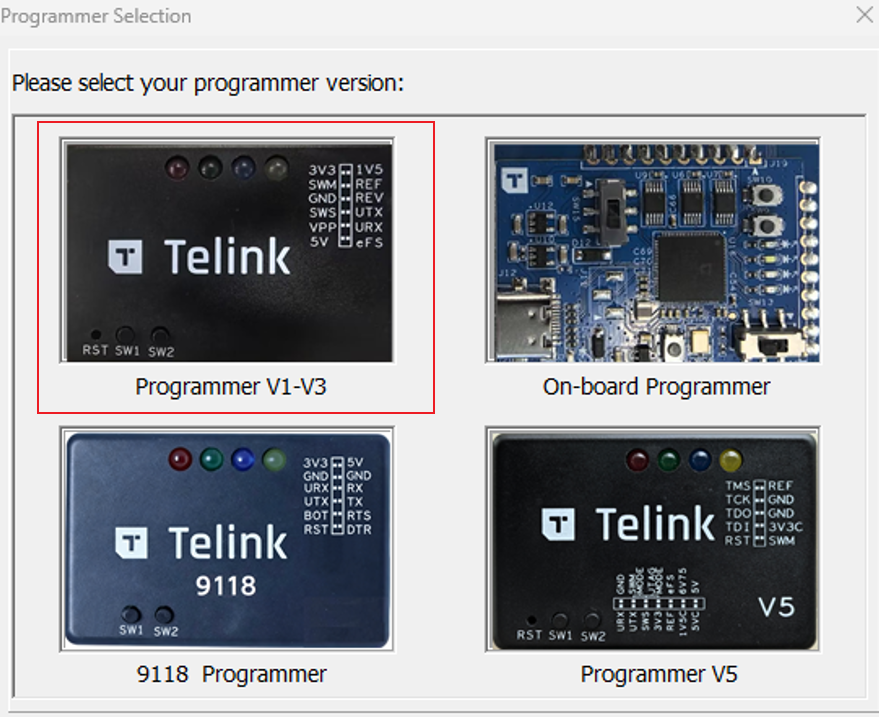
Select the programmer version and chip compatibility.
BDT supports multiple versions of programmers. You need to select the corresponding version according to the chip series used. The TL321x development board described in this document uses Programmer V3:
Step 3: Flash
-
Connect the device
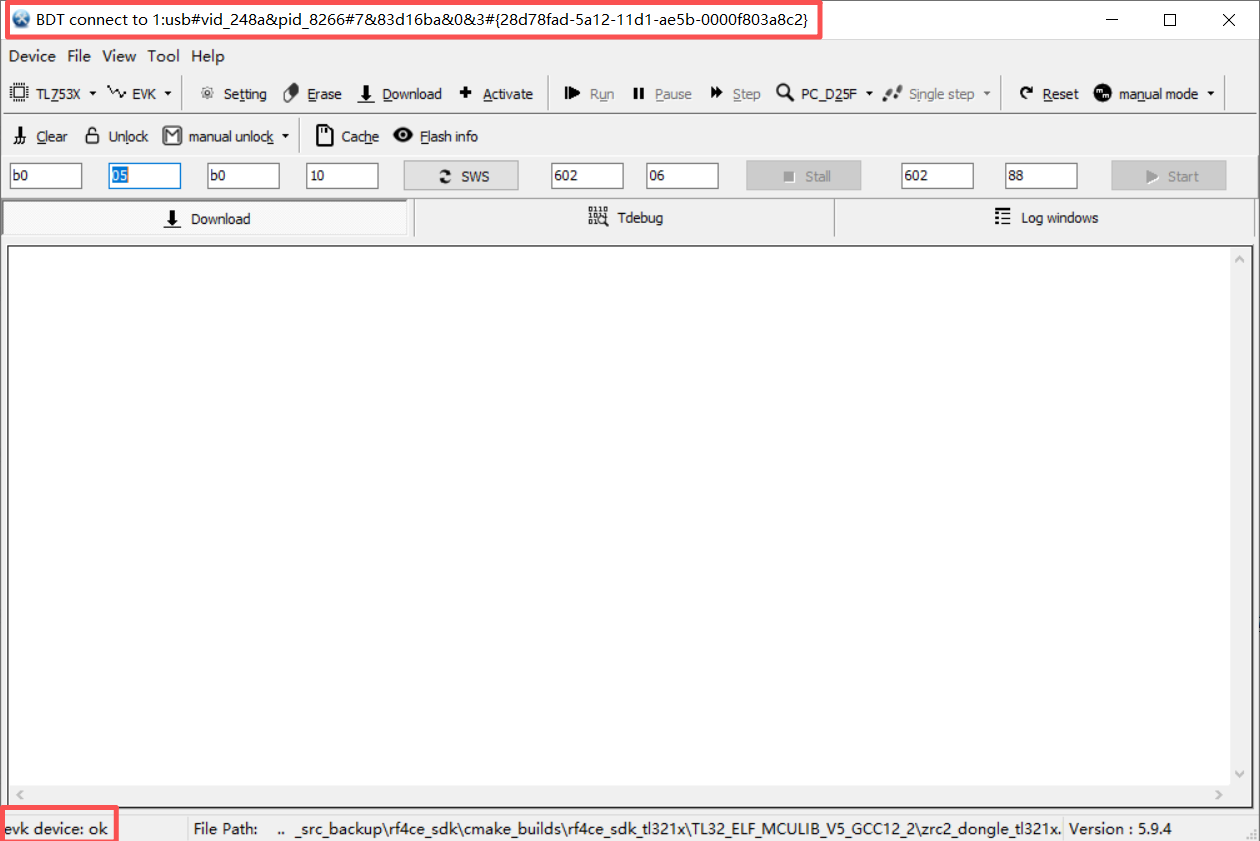
Open the BDT software. Before flashing the firmware, make sure the tool has detected the programmer, as shown in the figure below.
-
If BDT does not find the device, click Device -> Refresh to view the available devices.
-
If BDT finds multiple devices, all devices will be listed. After clicking Refresh, the first device is activated by default. You can also manually switch the target device in the list.
-
-
Configuration and flashing steps
-
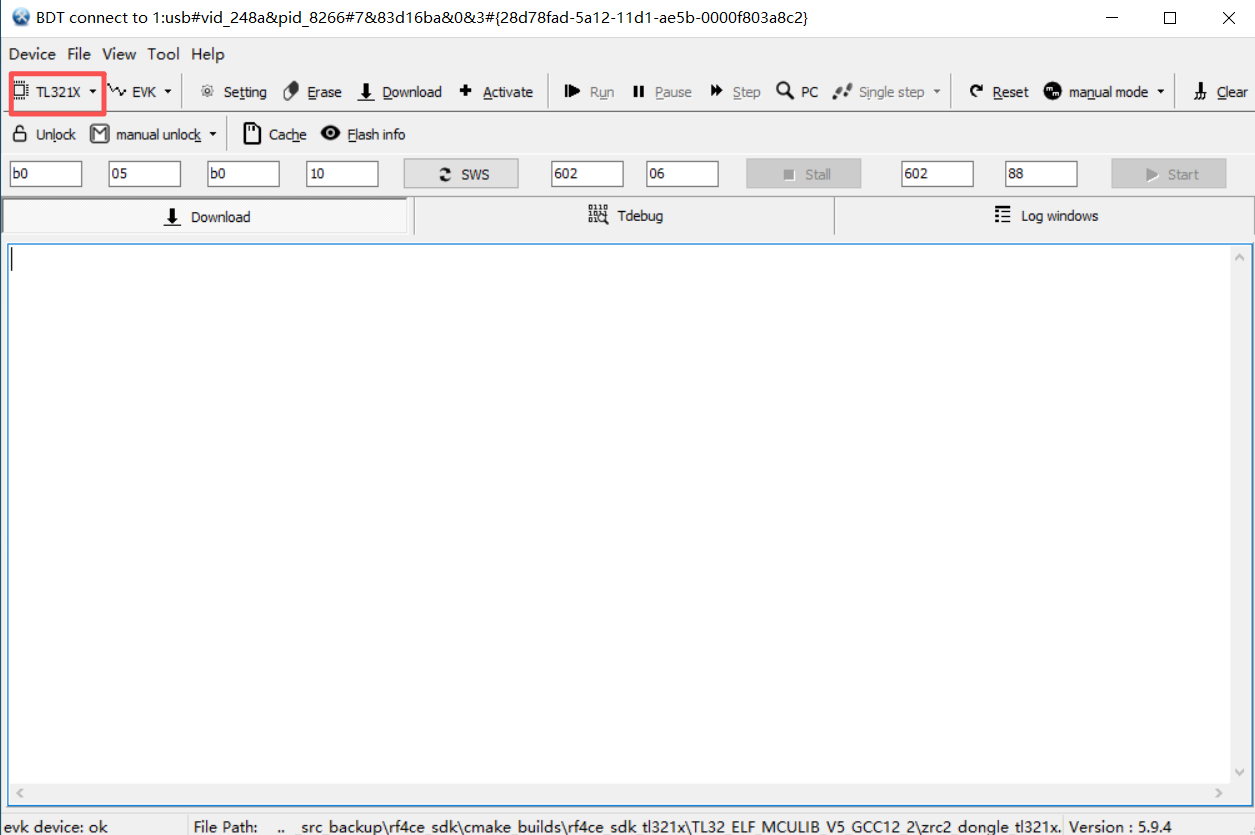
Select the chip series of the development board.
In the chip drop-down menu at the top, select the target chip corresponding to your development board, for example TL321x.
-
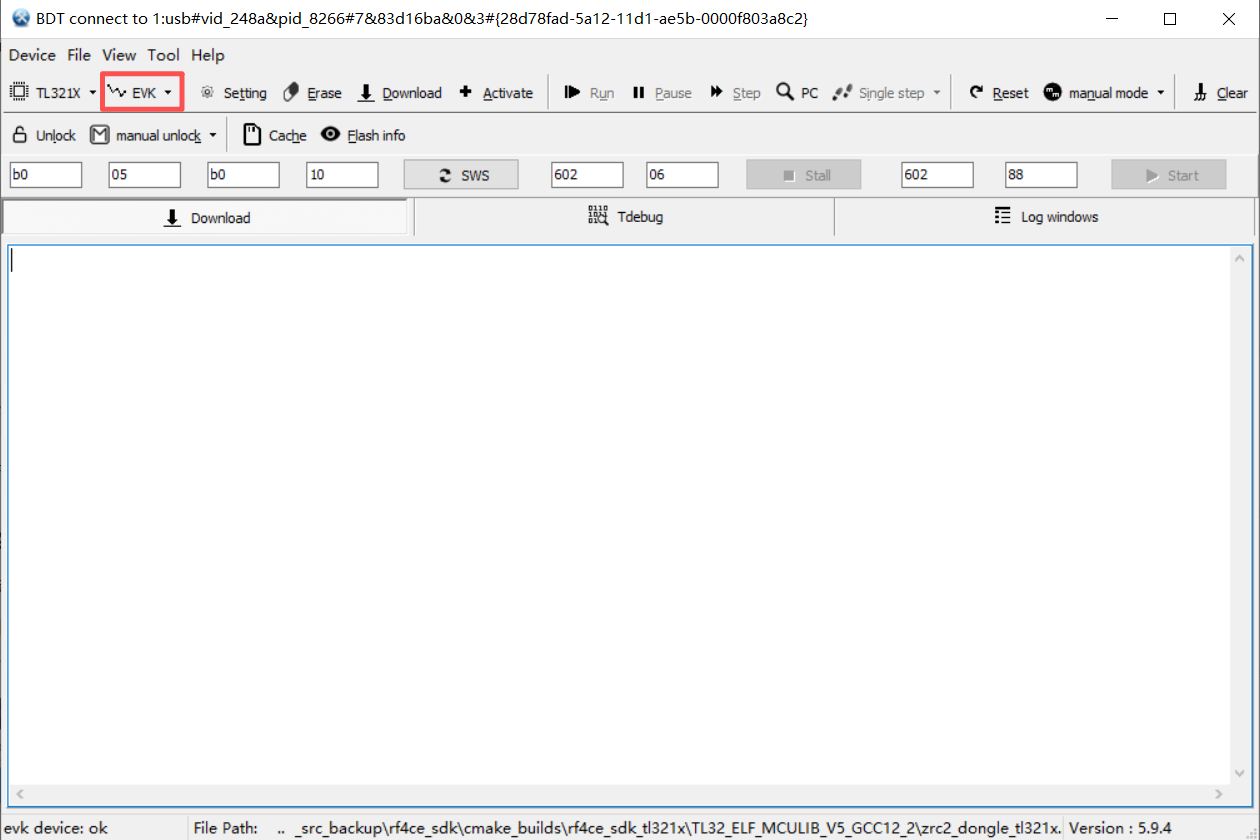
Select EVK as the download mode.
-
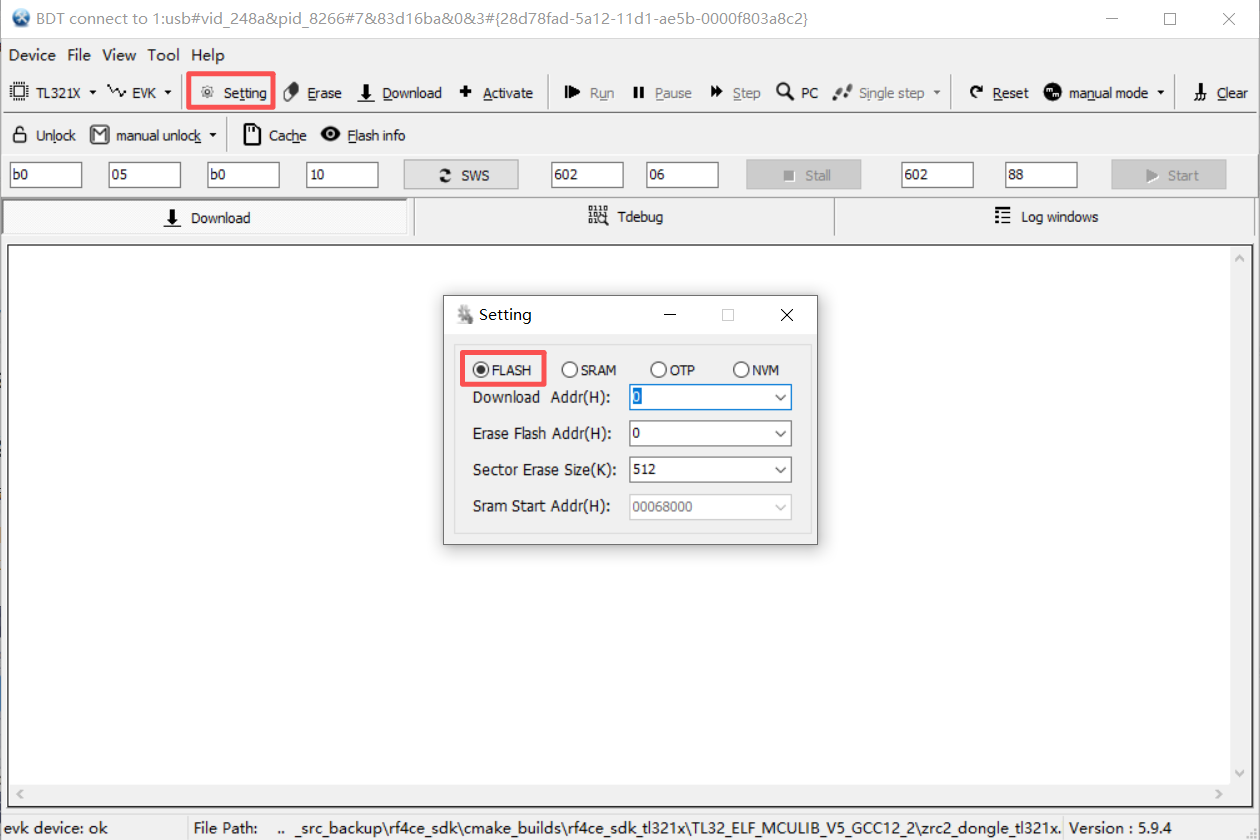
Click the Setting button to open the configuration window, and switch to the FLASH tab. Set the starting offset address of the firmware in the Download Addr field. The default value is 0x000000.
-
Click File -> Open/Reopen in the menu bar, and select the .bin firmware you compiled. After it is loaded successfully, the full file path will be displayed at the bottom of the main interface.
-
Check the connection status between the development board and the PC.
- If the connection status is normal, evk device: ok will be displayed in the lower-left corner of the main interface.
- If usb device: not found is displayed in the lower-left corner of the main interface, it means the development board is not correctly connected to the PC.
-
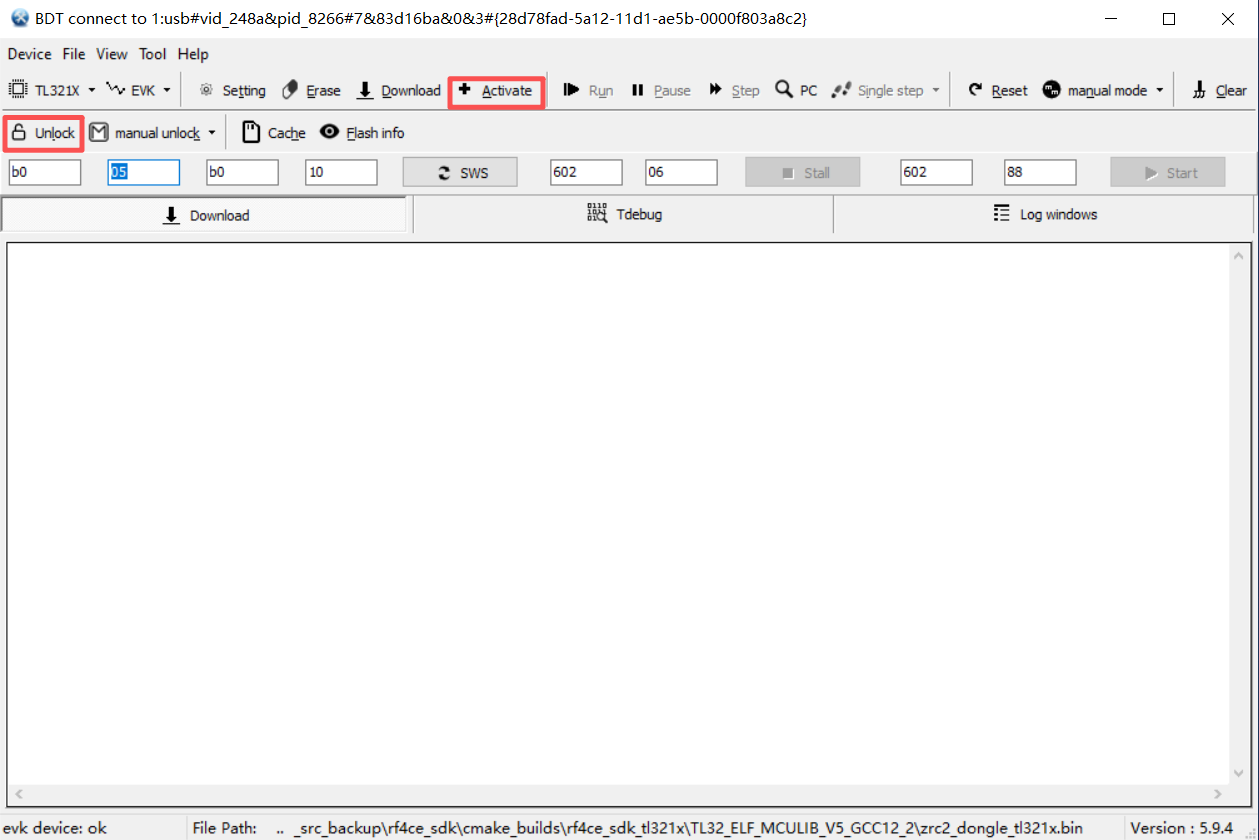
Click Active first, and then click the Unlock button or check the auto unlock option to release the write protection state of the flash.
If the flash is in a write-protected state, the Download will fail. Therefore, before flashing the firmware to the flash, make sure the flash is in a programmable state.
-
Click the Download button and wait for the log window to indicate that the flashing is successful.
-
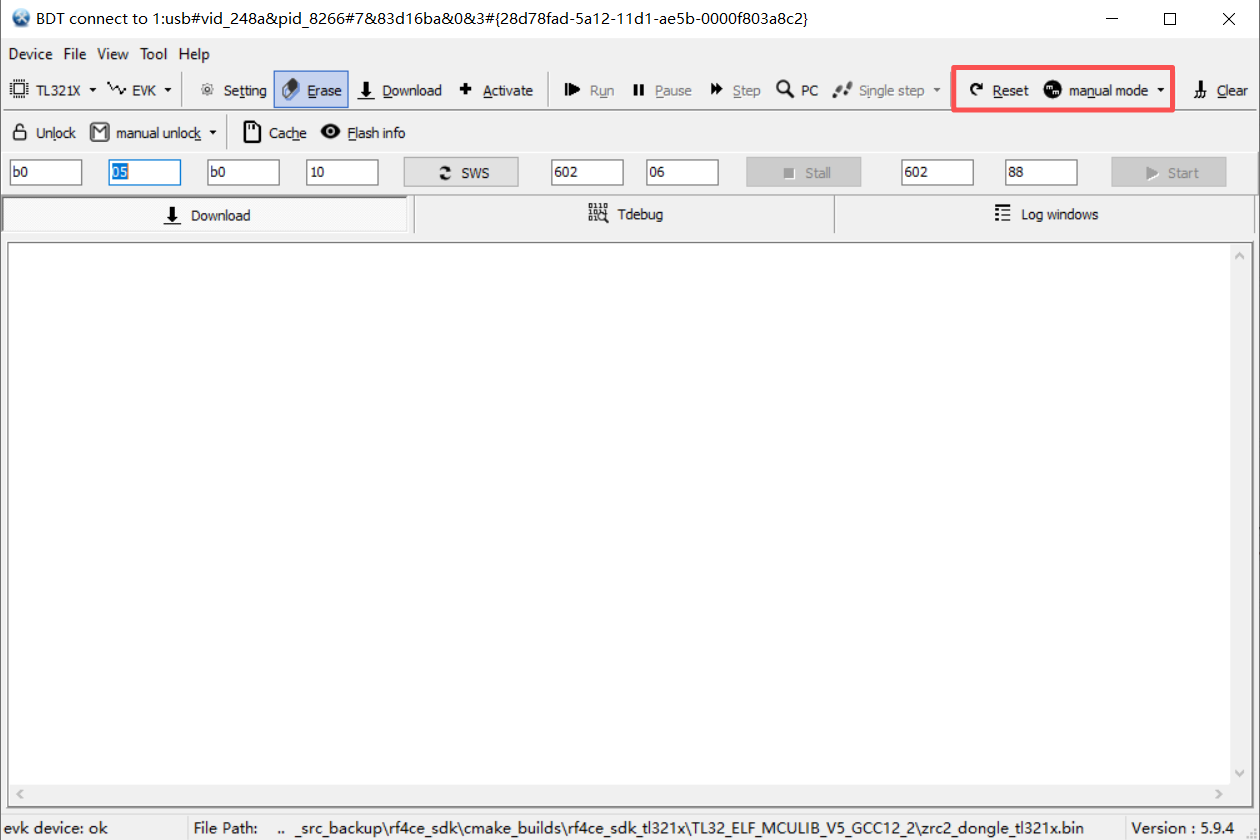
You can set the reset mode to auto mode before flashing, or switch to manual mode after flashing and click the Reset button to manually reset the MCU to run the program.
-
Verify the running result
After the firmware is flashed, verify whether the example program is running normally on the development board by following the steps below.
After the flashing is completed, reconnect the hardware for verification:
- Plug the Dongle development board directly into any USB port on the PC.
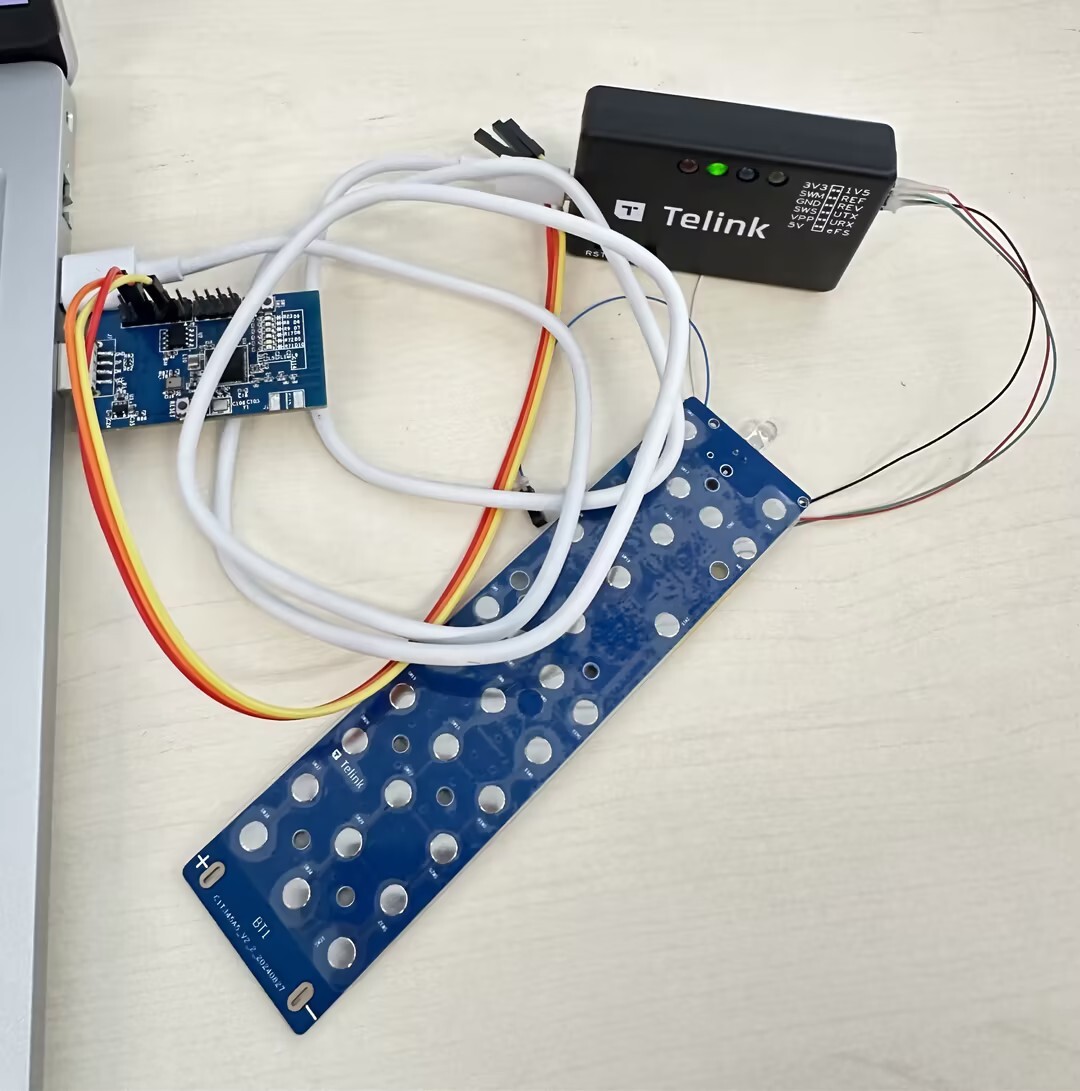
- RC development board: just keep it powered on using the programmer (or any 3.3V power supply). There is no need to connect it to the PC.
The overall verification connection is shown below:
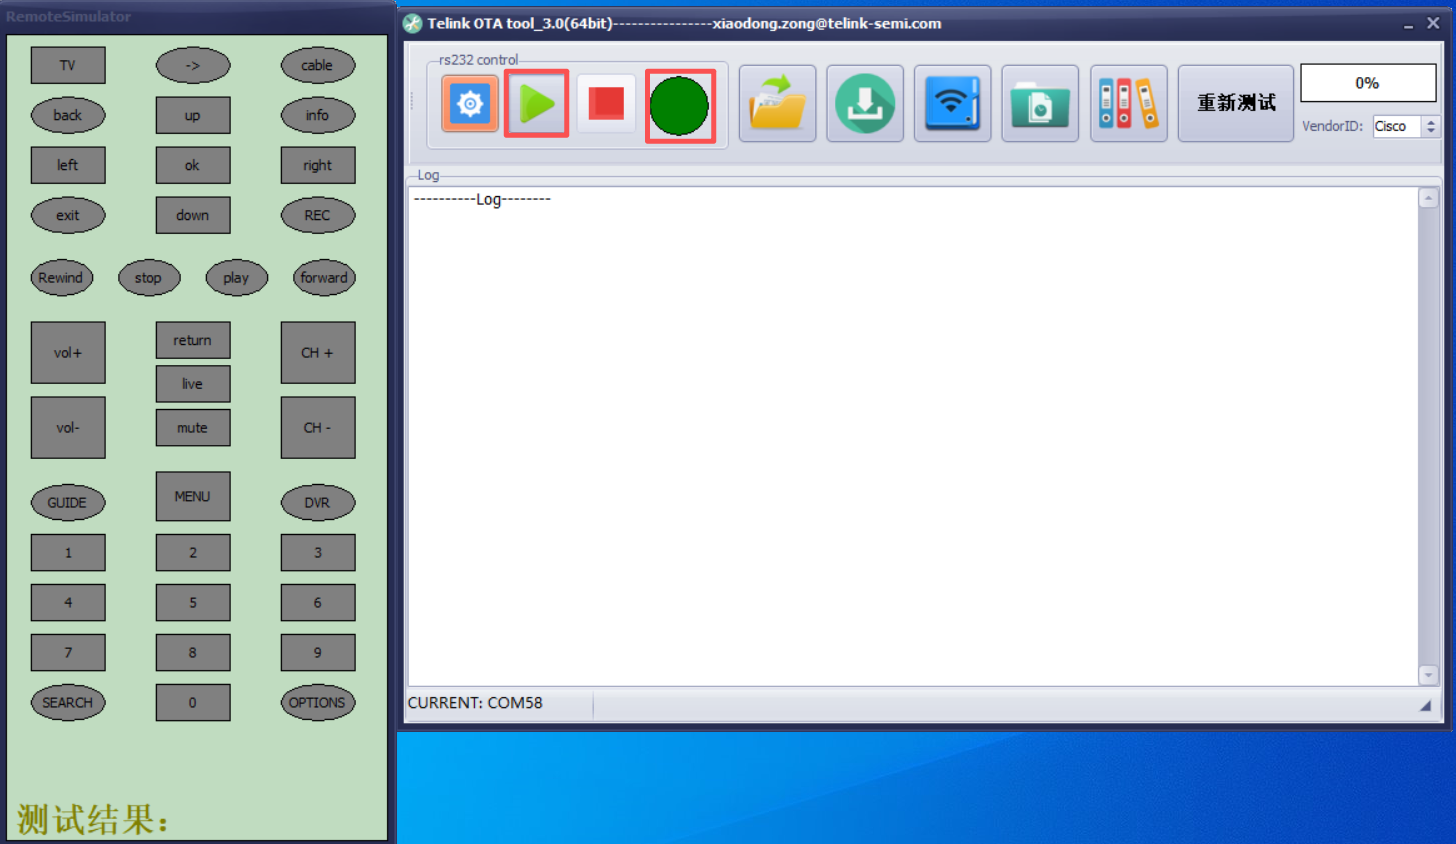
Use the host tool to complete the functional test of the example project:
-
After plugging the USB port of the Dongle development board into the PC, open the host tool (
RF4CE_KeySim3.0(64bit).exe), select the COM port corresponding to the Dongle under Setting, and click OK.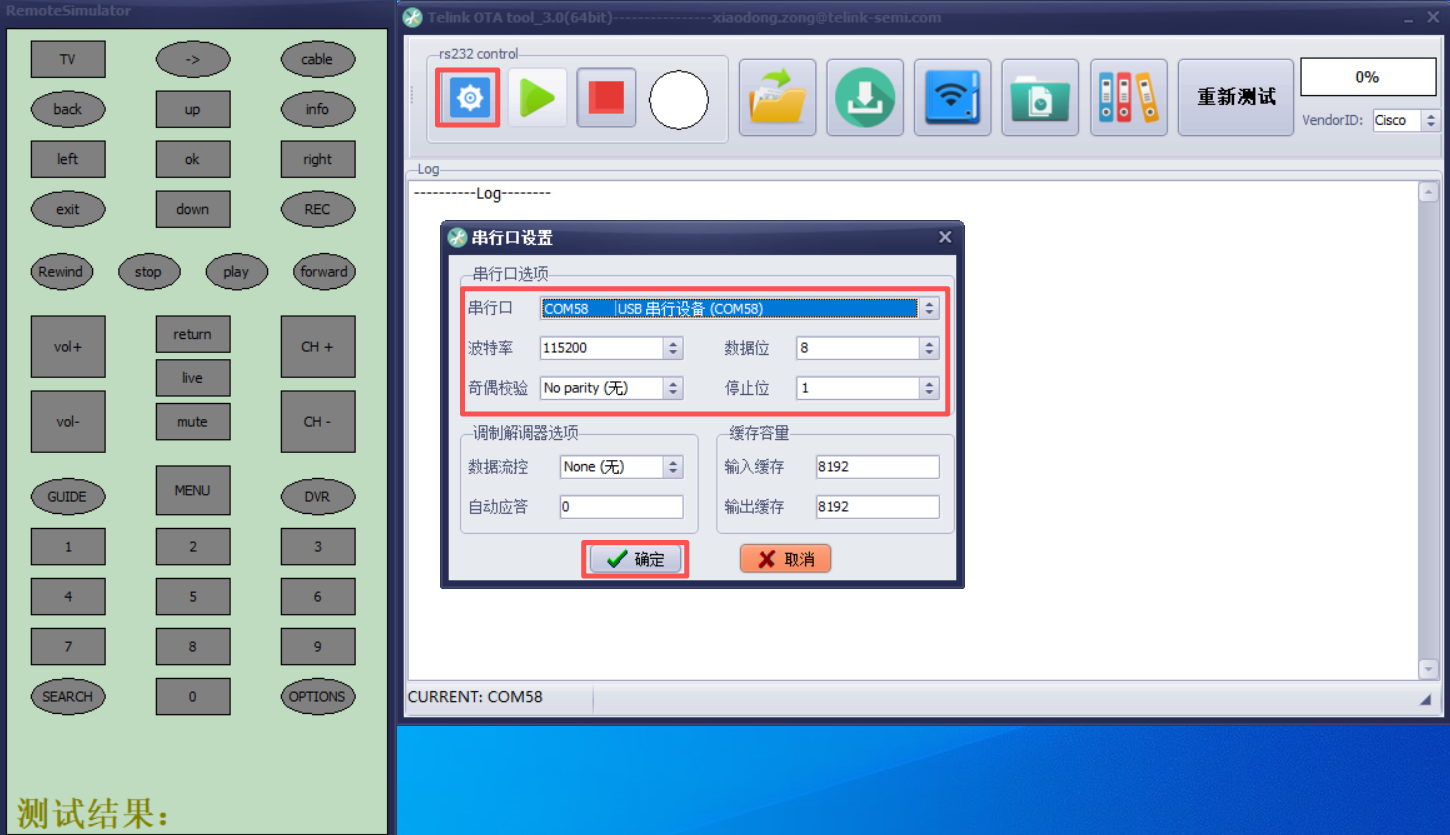
-
Click the Start Test button. The status button turns green, indicating that the test has started.
-
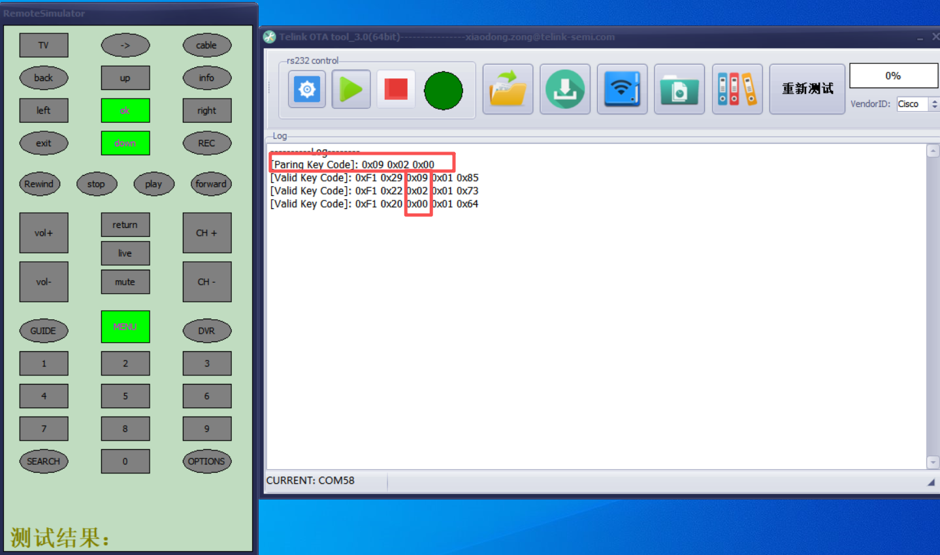
Press and hold the SW5 button on the RC development board for more than 5 seconds. The indicator light on the RC development board starts blinking, and the device enters the pairing mode.
-
Three numbers will pop up on the host interface. Enter these three numbers on the RC development board one by one as soon as possible. The indicator light on the RC development board will blink rapidly 3 times, indicating that the pairing process is complete.
According to the default configuration of the SDK TL321x, the key values of the RC development board are as follows:
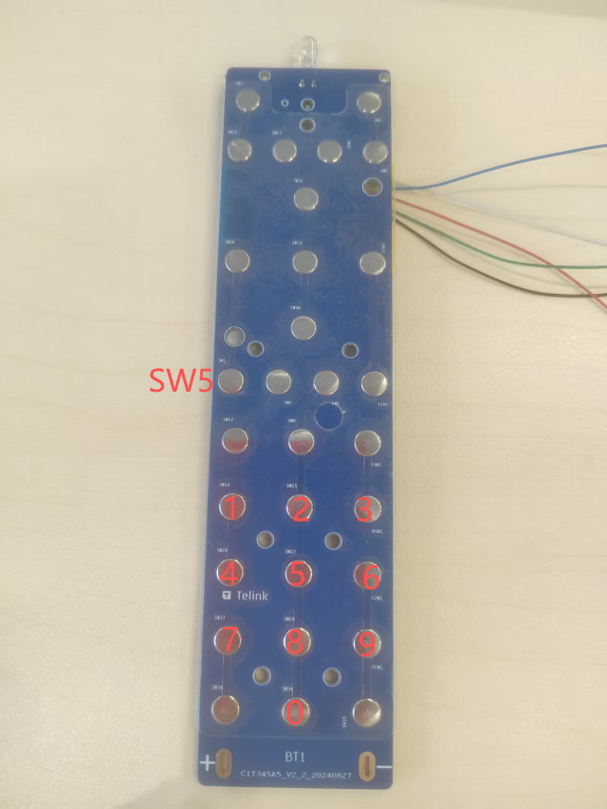
The key value configuration file is: ...\tl_rf4ce_sdk\vendor\rc_app\board_telink_rc_tl321x.h
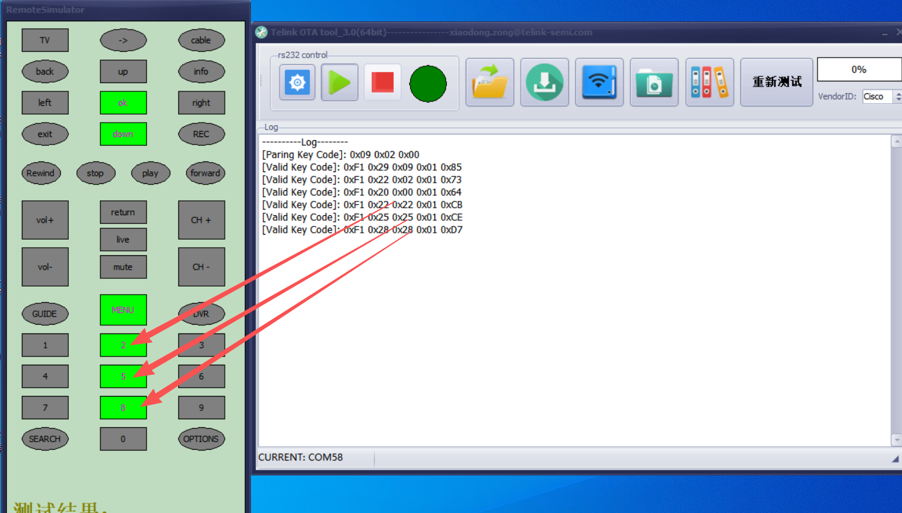
-
After the pairing is successful, press the buttons on the RC development board, and the host will display the key effects, as shown below:
Community and resources
| Resource | Description |
|---|---|
| Telink official forum | Technical exchange and support |
| Telink official website | Product center |
| Telink documentation website | Documentation center |
Appendix 1: FAQ
Environment installation failure
-
Possible cause: The installation path contains Chinese characters, so the installer cannot correctly identify the path.
Solution: Change the installation path.
-
Possible cause: The antivirus software running on the PC blocked the necessary operations of the installer during installation.
Solution: Temporarily close all running antivirus or security protection software before installation.
Compilation failure
-
Possible cause: The project was not cleaned after modifying the header files.
Solution: Clean the project before compiling.
-
Possible cause: The compilation fails with a prompt that the
boot.linkfile does not exist, which means the line ending format of the script file is CRLF.Solution: Save the line ending format of the script file as LF.
Flashing failure
-
Possible cause: The development board has not been activated (Activate) or unlocked (Unlock), so the chip is in a protected state and cannot receive flashing commands.
Solution: Before Download, click Activate first to activate the chip. After Activate MCU ok appears, perform the Download operation to flash the firmware.
Example runs abnormally
-
Possible cause: The currently flashed firmware does not match the hardware model of the development board in use.
Solution: Confirm the target chip series in the project configuration. After modifying it to the correct configuration, recompile, reflash, and run the program.
-
Possible cause: Residual data of other previously flashed programs remains in the flash memory of the development board.
Solution: Before flashing new firmware, perform an erase (Erase) operation first to clear the old data in the flash, and then flash the new firmware file.